
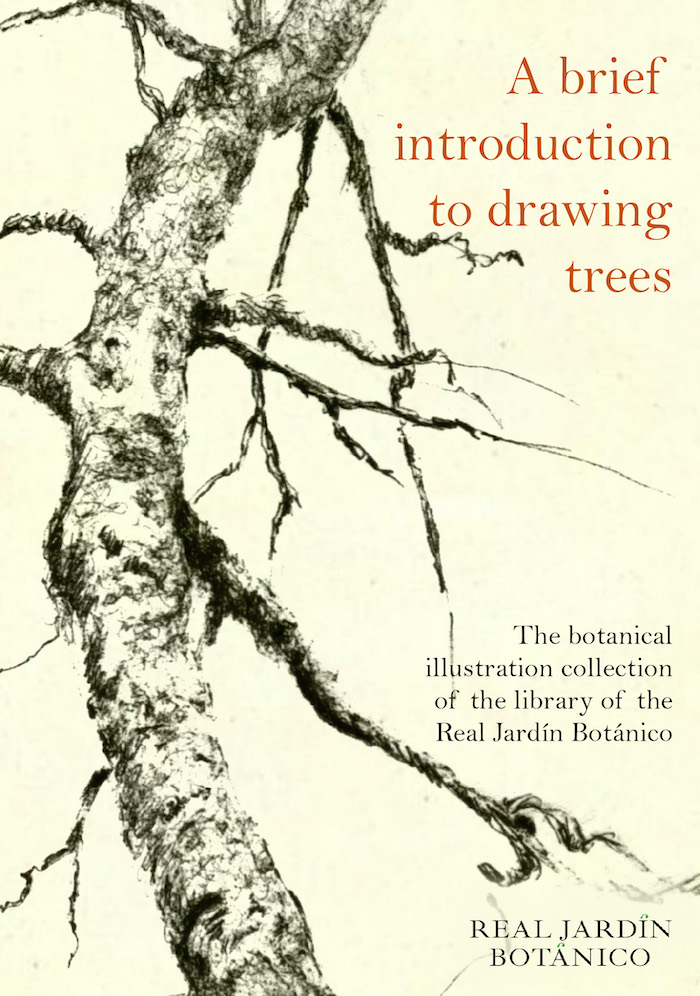
A brief introduction to drawing trees
Botanical illustration is a discipline of visual communication, based on artistic techniques whose main goal is to represent a plant in the most accurate way to display its essential features.
The library of the Real Jardín Botánico (RJB) has located, identified, described and organised a collection of more than 70,000 botanical illustrations, drawn from of a collection of our most valuable, ancient and special books. Various eras, artists, styles and printing techniques are well represented in this impressive botanical collection, which is now available on the internet. You can now locate these illustrations of plants and fungi via the main European digital heritage platform Europeana or via the RJB Digital Library website.
We encourage you to explore and consult the digital collection of botanical illustration, to (re-)use the contents in projects of any kind which might benefit from such documentation. Be inspired or simply enjoy the plants, flowers, leaves, fruits, seeds and roots; for the first time, these resources are offered in a digital format and properly described and identified.
Below, as an example of the potential use of the collection, we present this brief introduction to botanical illustration with the drawing of trees by the artist Baldi Perez. Besides showing some beautiful ink drawings of the birch (Betula alba), he includes useful and practical advice, recommendations, suggestions and ideas to take into account when making botanical illustrations.
Felix Alonso Sanchez/Head of the Library Unit of the Real Jardín Botánico
Drawing a birch tree
For this illustration project, our selected tree is a birch (Betula alba). As well as searching our collection for information on the specific characteristics of this species (leaves, flowers, fruits, trunk, form, etc.) it is always useful is to study interpretations from other artists.
Searching the collection digital botanical illustration of The Royal Botanical Garden library for images of your chosen species will make sure that your inspiring creation has the scientific precision that botanical illustration requires.
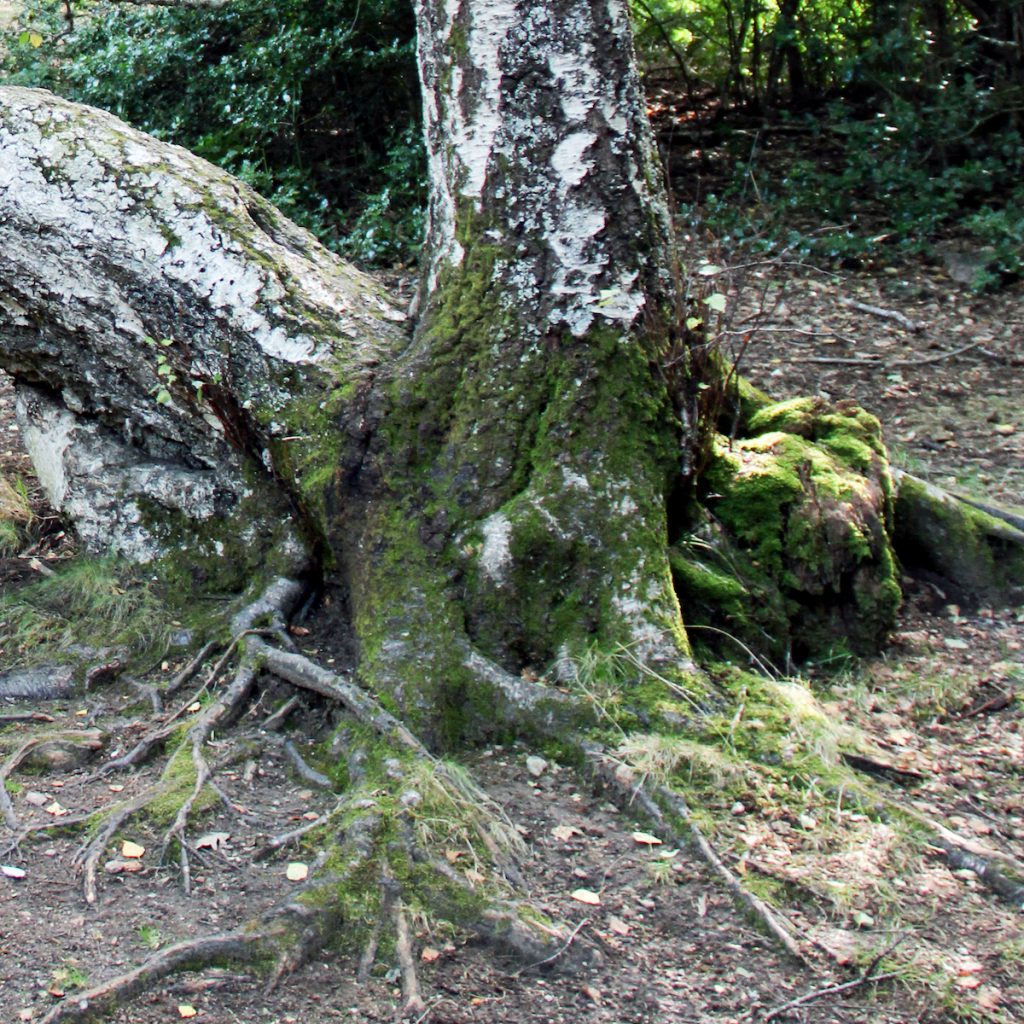
After your research phase, you will probably come to the conclusion that the prime attraction of the birch tree is its trunk. We discover that the silvery bark breaks up into strips, cracking with the passage of time and becoming darker and darker. This peculiarity is more evident in winter, when the tree loses its leaves.
The birch may also develop multiple trunks, as in the case of this one below:

Preparation of the image
Taking reference photographs can help. If your camera does not allow an entire tree to be photographed without losing detail, making several photos is a good solution. Most photo editing programs will allow you to merge them to create a single image.
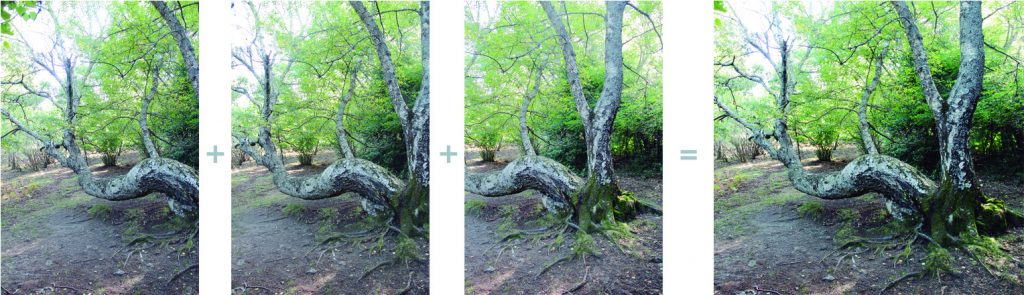
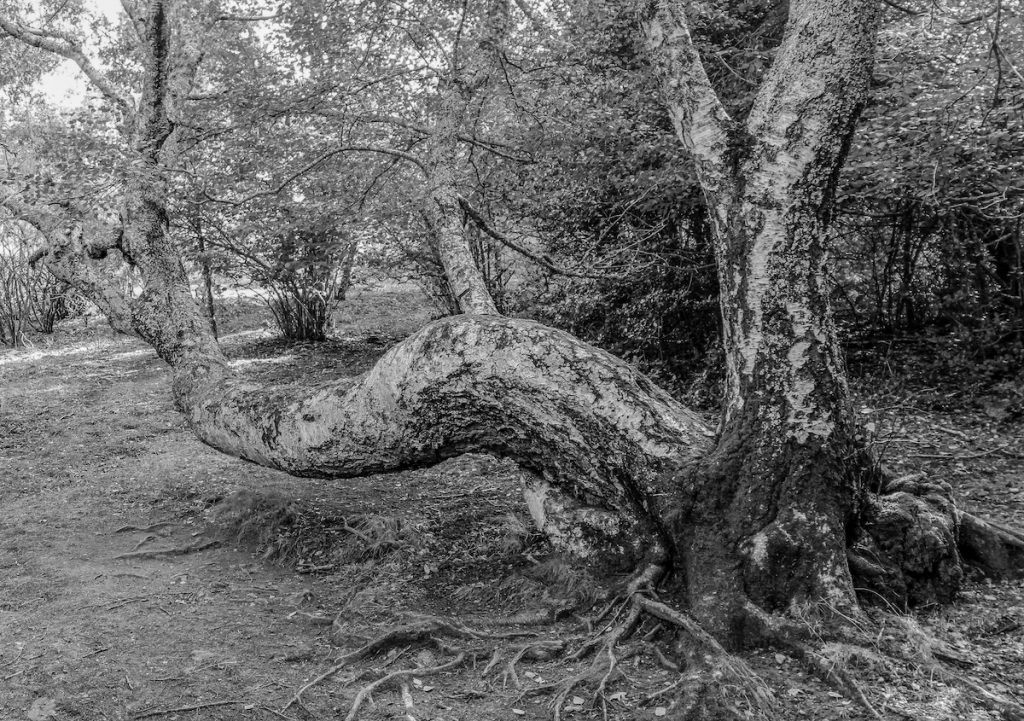
Once we have the definitive photo, we choose the composition. In the case of our selected birch, we chose a viewpoint or aspect that highlights the area of the neck of the tree and the horizontal trunk, a characteristic that makes this particular tree extremely special.
The next step will be to create a black and white version of the (composite) photo. This image will help us to see the grey graduation and to work correctly on the depth and the volume of the drawing. It will also help us to create detailed drawings of the areas we consider most important on the tree.
When studying the tree, it is advisable to make your preliminary sketches in ink and forget about the pencil and eraser. When we have no need to correct our work, because we are only making preparatory sketches, our lines become more fluid, and we lose the fear of making mistakes. The confidence we gain in making sketches makes us face the final drawing with much more confidence.
The black marker-brush makes us to analyse the areas of light and shadow, forcing us to create the intermediate shades by means of superimposed or alternating fine and coarse lines. We can also create shadows using a grey marker-brush. All this information will be very useful when we create the final illustration.
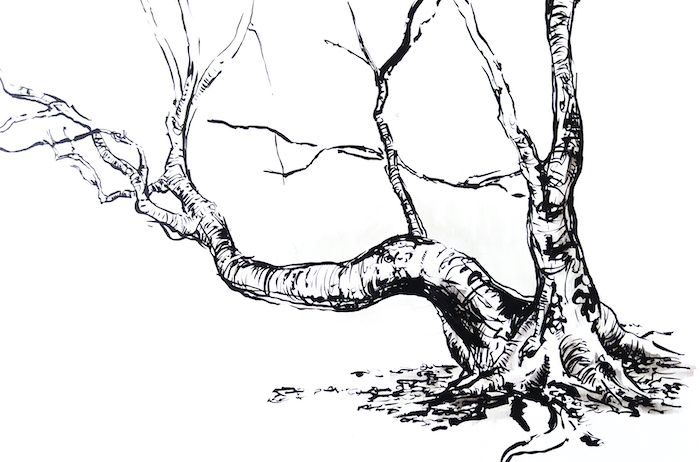
The creation of sketches helps us to better understand the structure of the tree. It is important to clearly show the orientation of the trunk and branches, and to capture their volume. It is usually advisable to draw directly from nature, although in this present case we will use a photo for the final illustration. This is because our eyes are capable of capturing details that escape the camera lens.
Materials
The choice of materials, especially at the outset, can be a real challenge. Visiting a fine art shop, it is easy to feel overwhelmed with the variety of materials and implements available. Fortunately, as we are using ink pens for this exercise, our choice of material is much easier.

For our illustration project we will use the following materials:
For trial sketches:
– Sketch paper with a minimum weight of 160g/m2.
– 1 marker with a black brush tip.
– 1 marker with a grey brush tip (optional).
For the final illustration:
– 1 graphite pencil: HB or H.
– 1 soft eraser, of the type used for charcoal.
– 3 calibrated black ink markers: 003, 005 and 01.
– 1 white acrylic pen with fine point.
– Coloured pencils (optional).
– 1 blade.
– 1 ruler.
– 1 sheet of 100% cotton paper. Satin 300g/m2.
– Wooden support, size DIN A3.
– Masking tape.
Paper is undoubtedly the most important of our materials. For the final illustration on quality paper, we will choose 100% cotton, acid-free paper with a weight of 300g/m2 or heavier. If you can find high quality watercolour satin paper such as the Arches, Fabriano or Canson brands, this will be perfect for this project. This kind of paper maintains its form, allows paper ageing without yellowing and allows for correction with a sharp blade, which is essential when working with ink.
The fine tips of these calibrated markers allow us to create a wide range of nuance which was unthinkable in earlier times. Marker brands such as Sakura, Kuretake and Uni Pin have non-fading ink, and are water resistant and acid free. It’s also an interesting effect to use a brush when making trial sketches or as an exercise to gain fluency in rendering the lines.
Because of their proportions, drawing trees can sometimes be a difficult task. It is complicated to capture them from a single perspective, and most of the time trees blend with their environment. When we find a suitable tree, we need to move away from it to properly take in the entire shape – but then we lose sight of the details. We can focus upon various aspects independently, so as to uncover the artistic potential of each – we can focus upon individual features such as the trunk, the leaves, its fruit, and finally upon on the whole tree.
Preparation of the final illustration
For this drawing, we will divide the sheet of paper into four equal parts. Cut the paper directly by hand, as this makes the edges uneven, a beautiful feature of this type of paper. Stick the sheet with masking tape to a wooden support, which helps to prevent the drawing being accidentally bent.
As the final drawing is considerably larger than the photo, it is best to use a pencil grid. This allows the drawing to be transferred to the final format square by square. First create the grid on the photo and then copy it on to the paper.
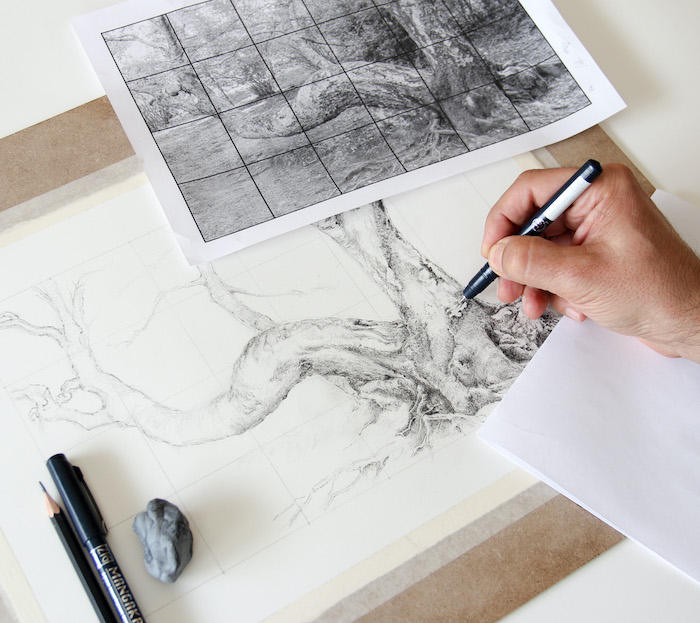
For the grid we can use an H or HB pencil. Draw minimal lines, marking only the areas that help us to understand better the size and shape of the tree.
Once ready with the grid, we start working with ink. The fine-tipped calibrated markers allow us to create a great deal of nuance. Now we can apply all the tonal study we did on the sketches. When we draw logs, we can create a high level of detail to correctly represent the texture of its bark.
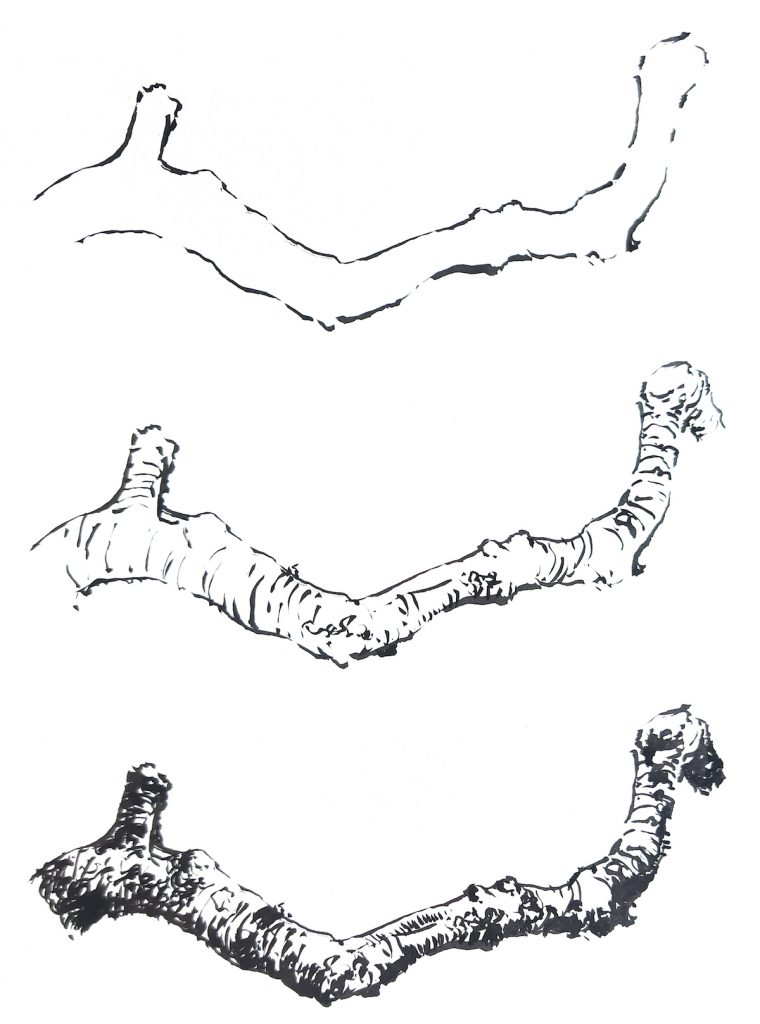
By superimposing line patterns, we can create a wide range of greys. Here’s an example of the effect we achieve by cross-hatching – superimposing layers of lines with various angles.

These types of marker also allow us to play with the amount of ink we transfer to the paper, so that the greys are more subtle and the level of detail is higher. This is very useful when we start using ink after having made the grid.
We will draw in layers. The first lines should be very soft or we’ll lose the light zones. Next, we will create increasingly darker shades of grey. The quality of the detail will depend on these grey transitions. They are very important when creating a sense of volume and depth in our illustration.

Once the drawing is finished, it’s often interesting add details with the white acrylic marker (above) or by gently scratching with the blade in areas where we want the paper to show through (below).

Finally, you can add some colour, using coloured pencils. In our final illustration, coloured pencils have been used to highlight areas with moss on the neck of the tree and roots.

The process can end here, or we can scan the illustration to continue work with photo editing programs – the digital world has infinite artistic possibilities.
The illustrator
Baldi Pérez (Cádiz)
Self-taught, Baldi has spent most of his working life in the field of graphic design and illustration. In 2018 he began to draw the RJB bonsai collection and a year later, these sketches ended up as the “Minimal Nature” series of illustrations, exhibited in the Royal Botanical Gardens and the Casa de las Ciencias in Valencia. Currently, his artistic work is focused on the study and drawing of trees. The first of these is a series of illustrations of logs that will be released in 2021.
Credits
Illustrations from the library of the Royal Botanical Garden:
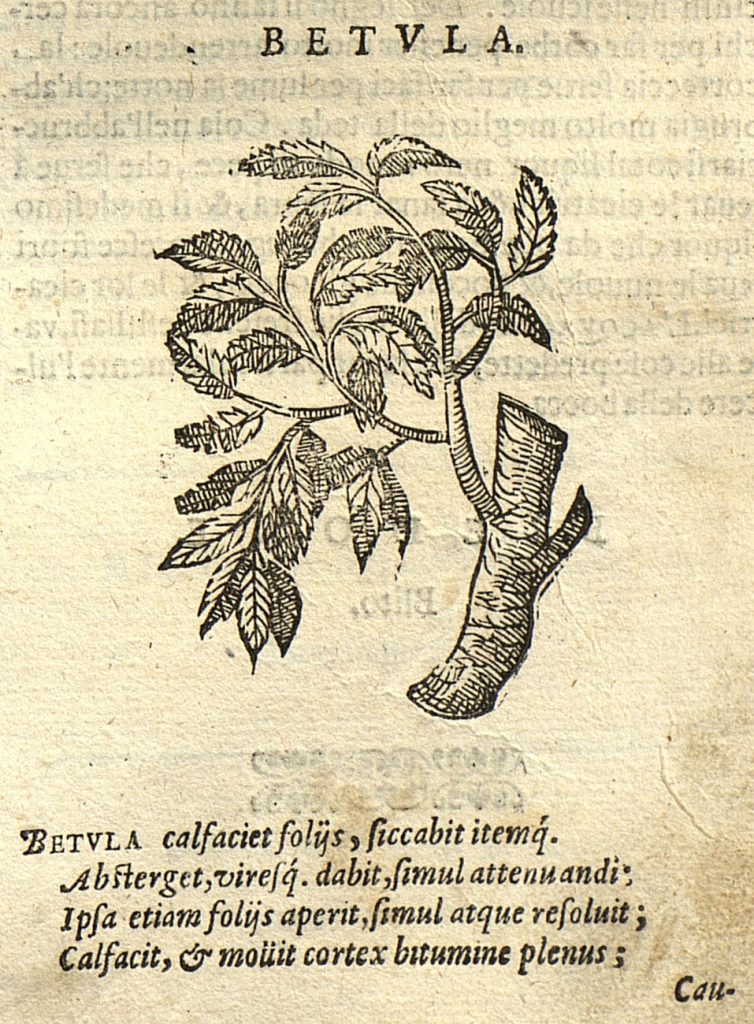
Castore During (1617) Herbario novo: http://www.europeana.eu/es/item/08711/bibliography_74971 CC BY-SA-NC.
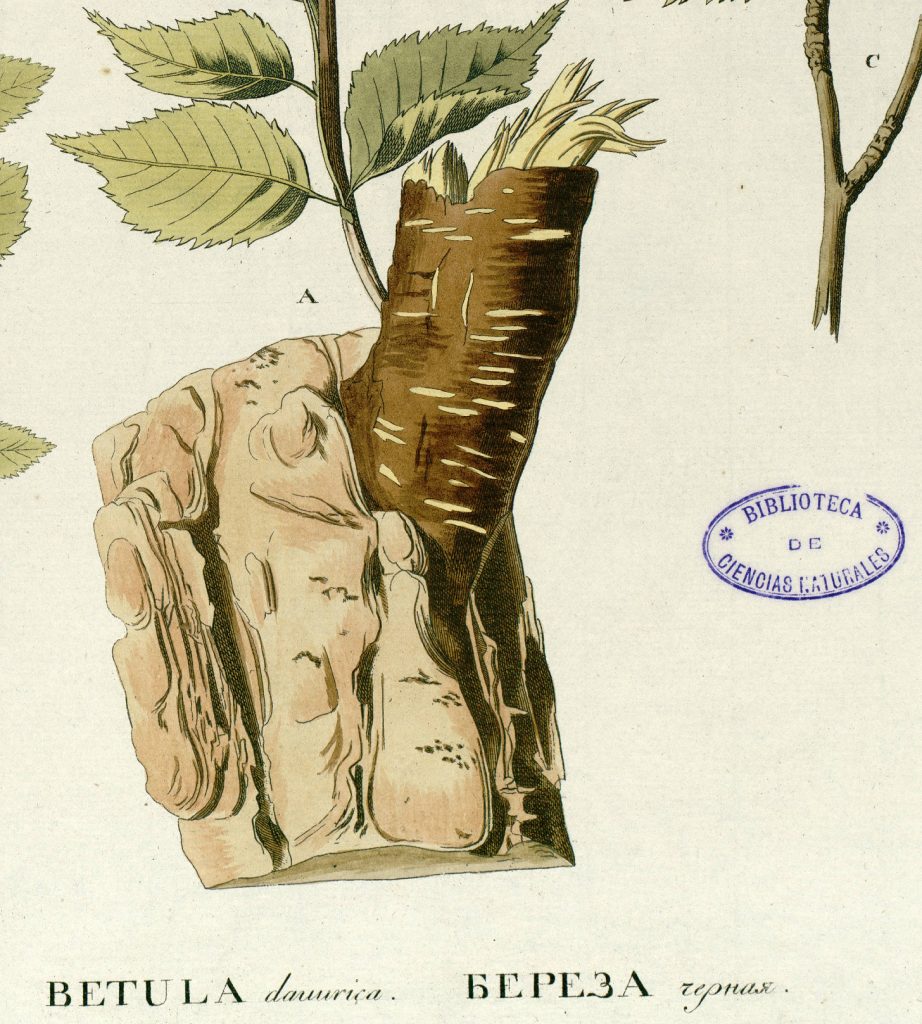
Peter Simon Pallas (1784) Flora Rossica: https://bibdigital.rjb.csic.es/idurl/1/11698 CC BY-SA-NC.
Illustrations and photographs:
Illustrations © Baldi Pérez CC BY
Photography © Violeta Pérez de Pablo CC BY